Showing posts with label Colors by Llarowe. Show all posts

Saturday, February 25, 2017

MelodySusie Professional Nail Drill


Hey, beauties!


It's been a while, huh? I haven't been doing my nails much, beyond painting, but I recently did a bit of art. I've been into makeup and other things lately, and you can check out my other blog for that, if you'd like. Today, I've got the MelodySusie Professional Nail Drill to share with you. As you probably know, I've got drills galore. My favorites are always the smaller ones, because I'm clumsy and they provide me with more control...this one is no exception.


First of all, what came with the drill was a nice surprise. In addition to the cord and a really good selection of bits, it comes with a dual-sided buffer, cuticle nipper, and nail brush. Basically, everything I need for a gel polish or enhancement removal and to prep for the next manicure.


Its first test was my daughter's enhancements. She recently had a birthday, and had been pestering me for years to allow her to get gels. I tried my best to discourage her, but she wore me down. The set she chose was a little too long for her comfort, so I used this drill to file them down a bit. She enjoyed them, then it was time for removal. The process was made much quicker with this drill, which I used to rough them up before soaking. Look at my baby giving all that '90's girl group realness! All she needed was a pair of door knocker earrings! :)


I've been keeping my own nails ultra-short lately, but I sometimes wear falsies for fun or events. This drill makes quick work of shortening and shaping them. For this look, I wanted an almond shape, but only had square, ballerina, and stiletto tips available. So, I threw on these ballerina tips by Ejiubas and went to work with my drill.


The drill has nicely shaped heads that allow me to get into the corners near the folds and close to the cuticles for actual enhancements. They're also easy to change out, and they stay put. I like, too, that quite a few of my small heads from other drills fit in this one. This drill is powerful, given how compact it is. It's extremely portable, and would fit in a small makeup bag for travel. It doesn't overheat or shut off, either, which is sometimes a problem with smaller drills like this one. My one complaint is that the head's rotation can slow if too much pressure is applied.


Using the drill to create an almond shape took about five minutes for both hands using the drill. I applied two coats of Julep Maria and did some simple stamping using Colors by Llarowe Burning Embers and Marianne Nails plate 90.


Overall, I'm happy with the performance of this drill, and very pleased with all the extras. If you'd like to check it out, you can find it here.


Thanks for stopping by!

Friday, December 5, 2014

My Fun and Snowy Manicure

Greetings! Today I have a fun winter manicure to share. This one started with Colors by Llarowe's Sandy, We Ain't in Kansas Anymore. I love this color in particular because it's a multichrome holo. Even without any special properties this one would be a stunner. It's a rich turquoise with silver shimmer. While my favorite color is purple, blue and turquoise are my favorite nail polish colors to wear, so this one was a no-brainer. The holographic flame in SWAIKA isn't particularly strong, but it is still quite visible, even though it was difficult to capture in photographs. What grabbed me, though, was the multichrome effect. It shifts from turquoise to royal blue to purple...love! I took a couple sunlight shots in an attempt to capture the shift.


I wore Sandy, We Ain't in Kansas Anymore for a few days. Since the weather's been cold, I've been trying to change my polish less often in order to minimize dryness and breakage as much as possible. I generally add some sort of nail art when it's time for a polish change. This way, I get some practice, build some confidence, and (in the event that it looks halfway decent) extend my manicure a bit. I stamped several designs using Konad white with plate QA19, purchased from Born Pretty Store (found here). I sponged Sinful Colors Snow Me White on a couple of the tips, and added rhinestones in blue and clear, also from Born Pretty, because I thought they'd go well with the snow theme and add a little shine.


All in all, I was pretty happy with how this attempt turned out. I got to practice my stamping and use some embellishments, but still managed to keep this gorgeous color in its rightful place as star of the show. As always, I thank you for looking!

Sunday, November 23, 2014

Bundle Monster 2014 CYO Stamping

Greetings! Today, I have Burning Embers from the Colors by Llarowe fall 2014 collection. Sadly, it is no longer offered, as it was one of their limited edition shades.To me, it's perfect for fall and I was lucky enough to grab one before they were gone. It is a gorgeous multichrome that shifts through copper, black, and magenta and contains tons of red and gold shimmer. It reminds me of my absolute favorite thing about fall, the changing leaves.

 
I just love CbL's formulas! The few I've tried have applied like a dream, and Burning Embers was no exception. It was a little thick, so I added a few drops of thinner, and applied two syrupy smooth coats over Nubar Foundation, then topped it with Glisten & Glow's HK Girl.


I'd gone four (chip-free!) days and decided it was time for a polish change when the mail arrived...containing my Bundle Monster CYO 2014 collection! This is my first Create Your Own collection (and only my second ever stamping plate purchase), and if you're not familiar, it's a stamping plate set filled with designs created by fans. I'm new to stamping (as you can clearly see), so it's exciting to have plates designed by bloggers I follow and whose art I admire so much. So, I immediately reached for my Konad white. The first design I tried was created by the talented Eva over at Flight of Whimsy. Her design can be found on plate BM-607, and my attempt does it no justice.

I also tried another image from the same plate, and here you'll have a rare look at my right hand. I keep the nails on this hand trimmed much shorter, mostly because it's my dominant hand and I just cannot grasp the fact that I'm not supposed to use my nails to do things. They grow just as well as on the left, but I always end up hurting myself. I chose a more forgiving design for these since I'm not at all adept in the use of my left hand.


These Bundle Monster plates are amazing! My only complaint is that the full sized images are a little too small. I currently use the firm double-ended Konad stamper. I'm waiting for what I think is a squishy stamper to arrive. I understand beginning stampers have better luck with the squishier ones, so I'm hopeful. Until then, I'll keep trying. Thanks for looking!

Wednesday, November 5, 2014

Colors by Llarowe - Mercy

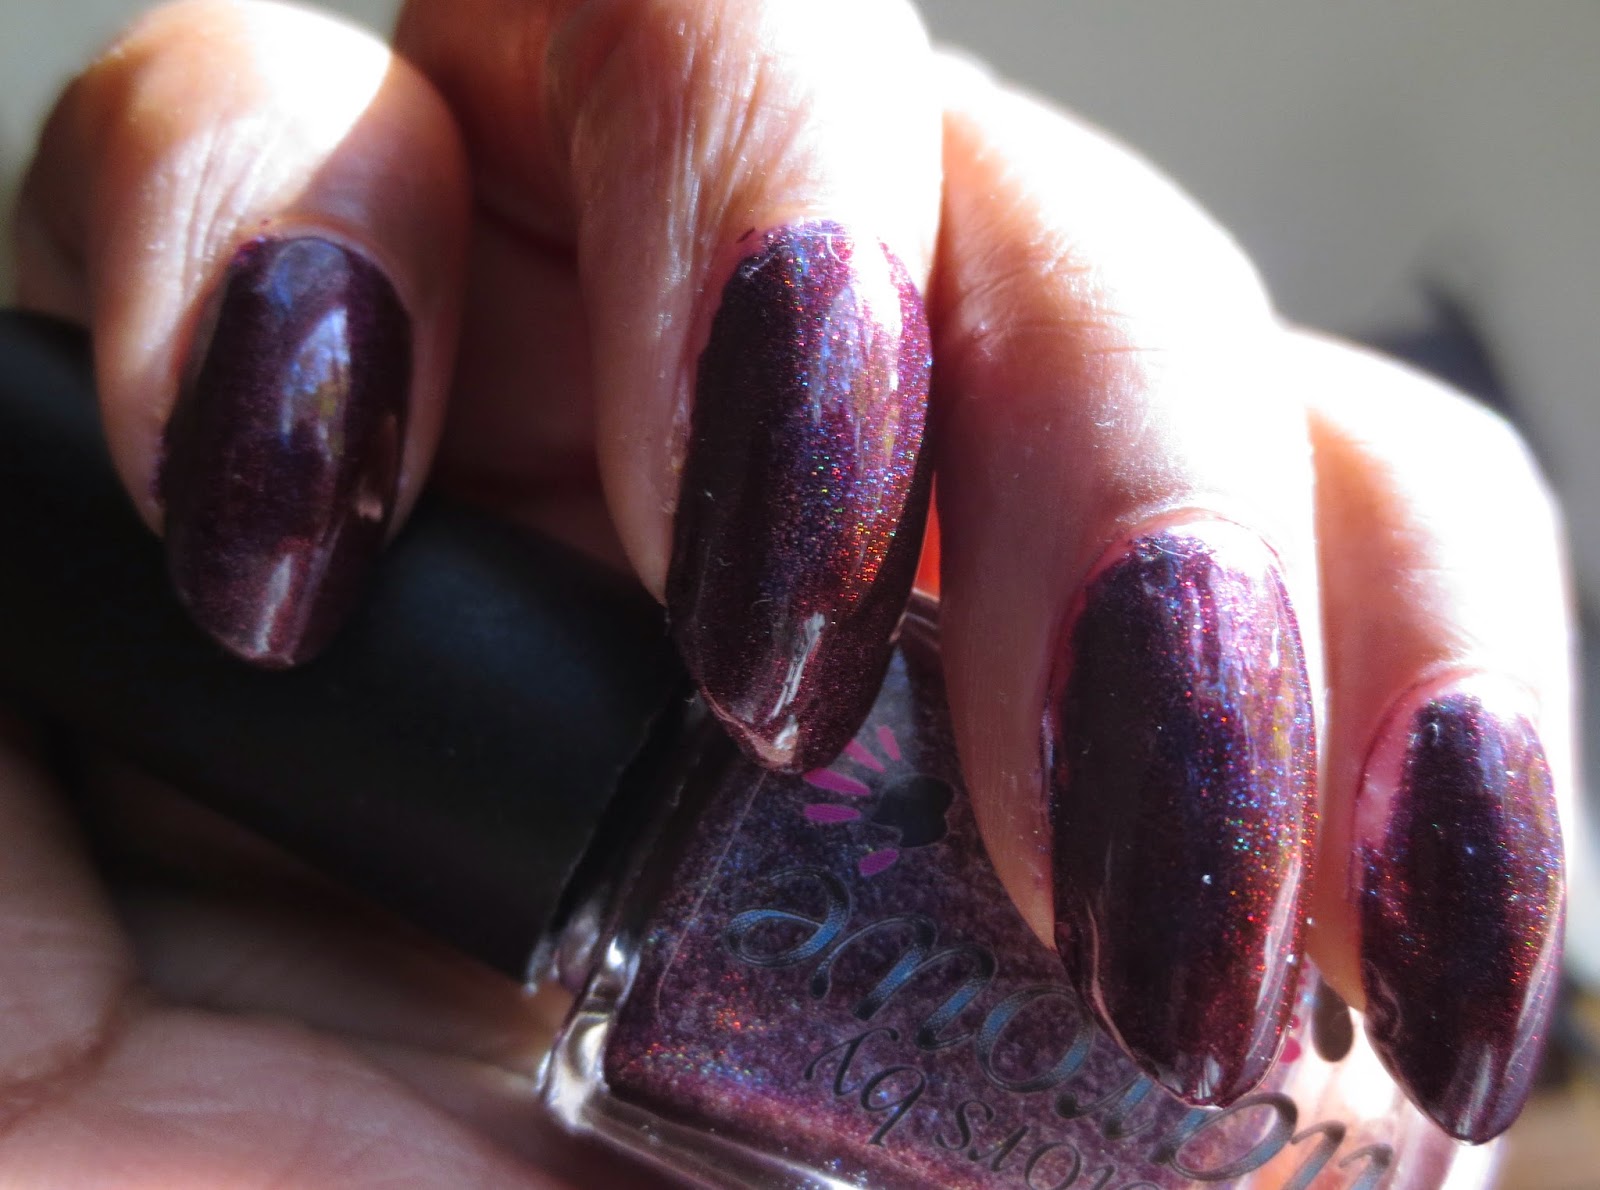
Greetings! Today's post is about Colors by Llarowe Mercy. Mercy is part of the CbL Fall 2014 collection, and is described as a "deep eggplant intense linear holo". Although on me, the color read more burgundy than eggplant, it was deep, rich, and almost vampy under indoor lighting. When the sun hit it, though, the rainbows came out to play! The holographic effect was so strong I could hardly take my eyes off it.


Please note: Any flaws are the result of my terrible polishing and clean up skills...I'm working on it!  Mercy applied smoothly, and was fully opaque in one coat. That's right, a one-coater! I did apply two coats, though (pure habit), over a base of CND Stickey. I topped it with a coat of Darling Diva Pryzmatic Performance Enhancing Top Coat. I'll be writing more about PETC at a later date.


Photos were taken in a combination of direct and indirect sunlight. I used my flash for the last two in an attempt to capture the holo flame and show off those amazing rainbows.


Generally, I am not a fan of traditional fall colors. I prefer blues and brights year-round, but CbL Mercy is a stunner. Mercy, indeed!